Presentations
Since version 0.19.0, Zettlr is able to export your Markdown files directly as presentation files using the reveal.js-framework. reveal.js is a lightweight solution for creating super compatible presentations using plain HTML and JavaScript. Therefore, these presentations can be shown on all computers that run a browser — nowadays this means: they run on every computer.
For exporting Markdown files to reveal.js, you have to make sure Pandoc is installed on your computer. Head over to the section on exporting to see how to install pandoc.
If you first want to be impressed by an actual export from Zettlr into reveal.js, please have a look at the demonstration presentation! You can also read the source file while following the instructions on this page.
Pre-considerations
Of course, a Markdown document that should be compiled into a presentation has a slightly different structure than other Markdown documents.
Creating slides
You can create new slides in two ways. First, each heading level 1 will begin a new slide and also act as the title of the slide. But in case the heading level 1 is too big for your taste, or you simply don't want a title on that slide, you can also delimit slides by using Markdown dividers (either *** or ---).
Everything that follows the heading or the divider will end up being the content of the slides. You do not have to explicitly "end" the last slide with a divider.
Using Markdown elements
Inside the slides, you can use all Markdown elements. They will be rendered as you would expect them. You can even use footnotes which will then be placed on their own, respective slide at the end!
Advanced Tools
Of course, reveal.js presentations also have the same versatility as PowerPoint or Impress when it comes to controlling your presentation. For instance, you can use CSS-classes to tell the presentation that certain elements should be triggered before forwarding the presentation. These are called "fragments". Due to limitations in Pandoc's engine, you'll have to use plain HTML to achieve this. Consider, for instance, the HTML code from the demo presentation:
<ul>
    <li class="fragment fade-in">This item will fade in.</li>
    <li class="fragment highlight-blue">This will be highlighted blue.</li>
    <li class="fragment highlight-red">All available transitions are documented [here](https://github.com/hakimel/reveal.js/#fragments).</li>
</ul>
This will create a list with three items. All items are "fragments", which means that by pressing the shortcut for the next slide, the first will fade-in, as the class says. On the next press of the right arrow key, the second item will be highlighted in blue color. The third press of the right arrow key will highlight the last item red. And on the fourth press of the arrow key the next slide will be shown.
Presentation settings
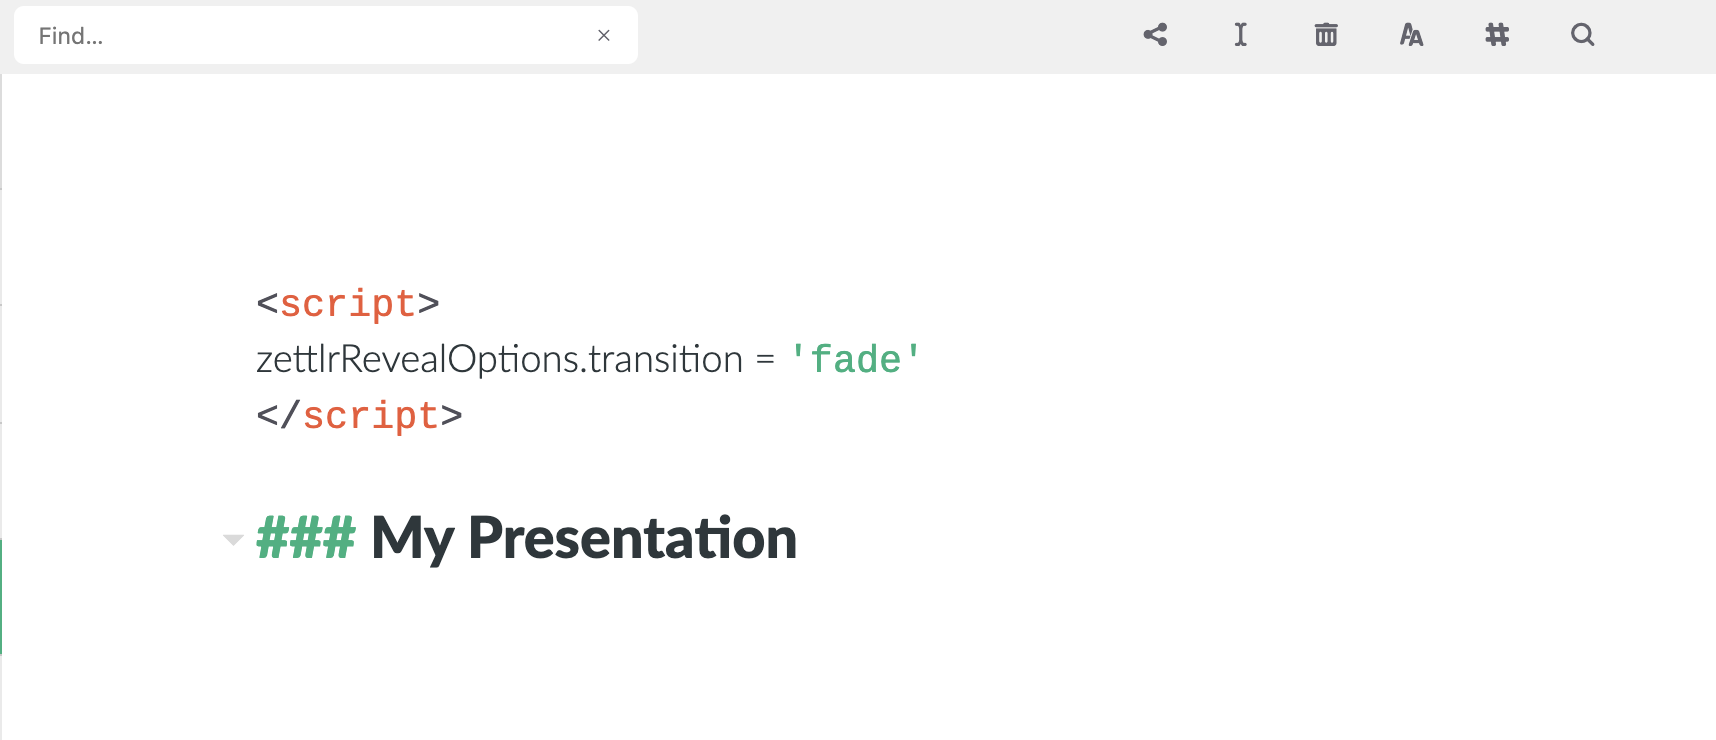
Of course, the presentation itself also has settings that you can make use of. These are simple JavaScript directives that you can manipulate by inserting a <script>-tag as shown in the screenshot. You can override them by setting the attributes on the zettlrRevealOptions-object. These are the options you can set:
const zettlrRevealOptions = {
        // Display controls in the bottom right corner
        controls: true,
        // Display a presentation progress bar
        progress: true,
        // Display the page number of the current slide
        slideNumber: true,
        // Push each slide change to the browser history
        history: true,
        // Enable keyboard shortcuts for navigation
        keyboard: true,
        // Enable the slide overview mode
        overview: true,
        // Vertical centering of slides
        center: true,
        // Enables touch navigation on devices with touch input
        touch: true,
        // Loop the presentation
        loop: false,
        // Change the presentation direction to be RTL
        rtl: false,
        // Randomizes the order of slides each time the presentation loads
        shuffle: false,
        // Turns fragments on and off globally
        fragments: true,
        // Flags if the presentation is running in an embedded mode,
        // i.e. contained within a limited portion of the screen
        embedded: false,
        // Flags if we should show a help overlay when the questionmark
        // key is pressed
        help: true,
        // Flags if speaker notes should be visible to all viewers
        showNotes: false,
        // Global override for autolaying embedded media (video/audio/iframe)
        // - null: Media will only autoplay if data-autoplay is present
        // - true: All media will autoplay, regardless of individual setting
        // - false: No media will autoplay, regardless of individual setting
        autoPlayMedia: null,
        // Number of milliseconds between automatically proceeding to the
        // next slide, disabled when set to 0, this value can be overwritten
        // by using a data-autoslide attribute on your slides
        autoSlide: 0,
    // Stop auto-sliding after user input
        autoSlideStoppable: true,
        // Enable slide navigation via mouse wheel
        mouseWheel: false,
        // Hides the address bar on mobile devices
        hideAddressBar: true,
        // Opens links in an iframe preview overlay
        previewLinks: false,
        // Transition style
        transition: 'convex', // none/fade/slide/convex/concave/zoom
        // Transition speed
        transitionSpeed: 'default', // default/fast/slow
        // Transition style for full page slide backgrounds
        backgroundTransition: 'fade', // none/fade/slide/convex/concave/zoom
        // Number of slides away from the current that are visible
    viewDistance: 3,
    // The display mode that will be used to show slides
    display: 'block'
};
Presentation Styling
If none of the available themes appeal to you, or if you need to provide some extra CSS, you can do so simply by dropping in a <style>-tag somewhere in your presentation.
You'll need some knowledge of CSS to finegrain the styling, but the appearance of the presentation itself should be satisfying on its own.
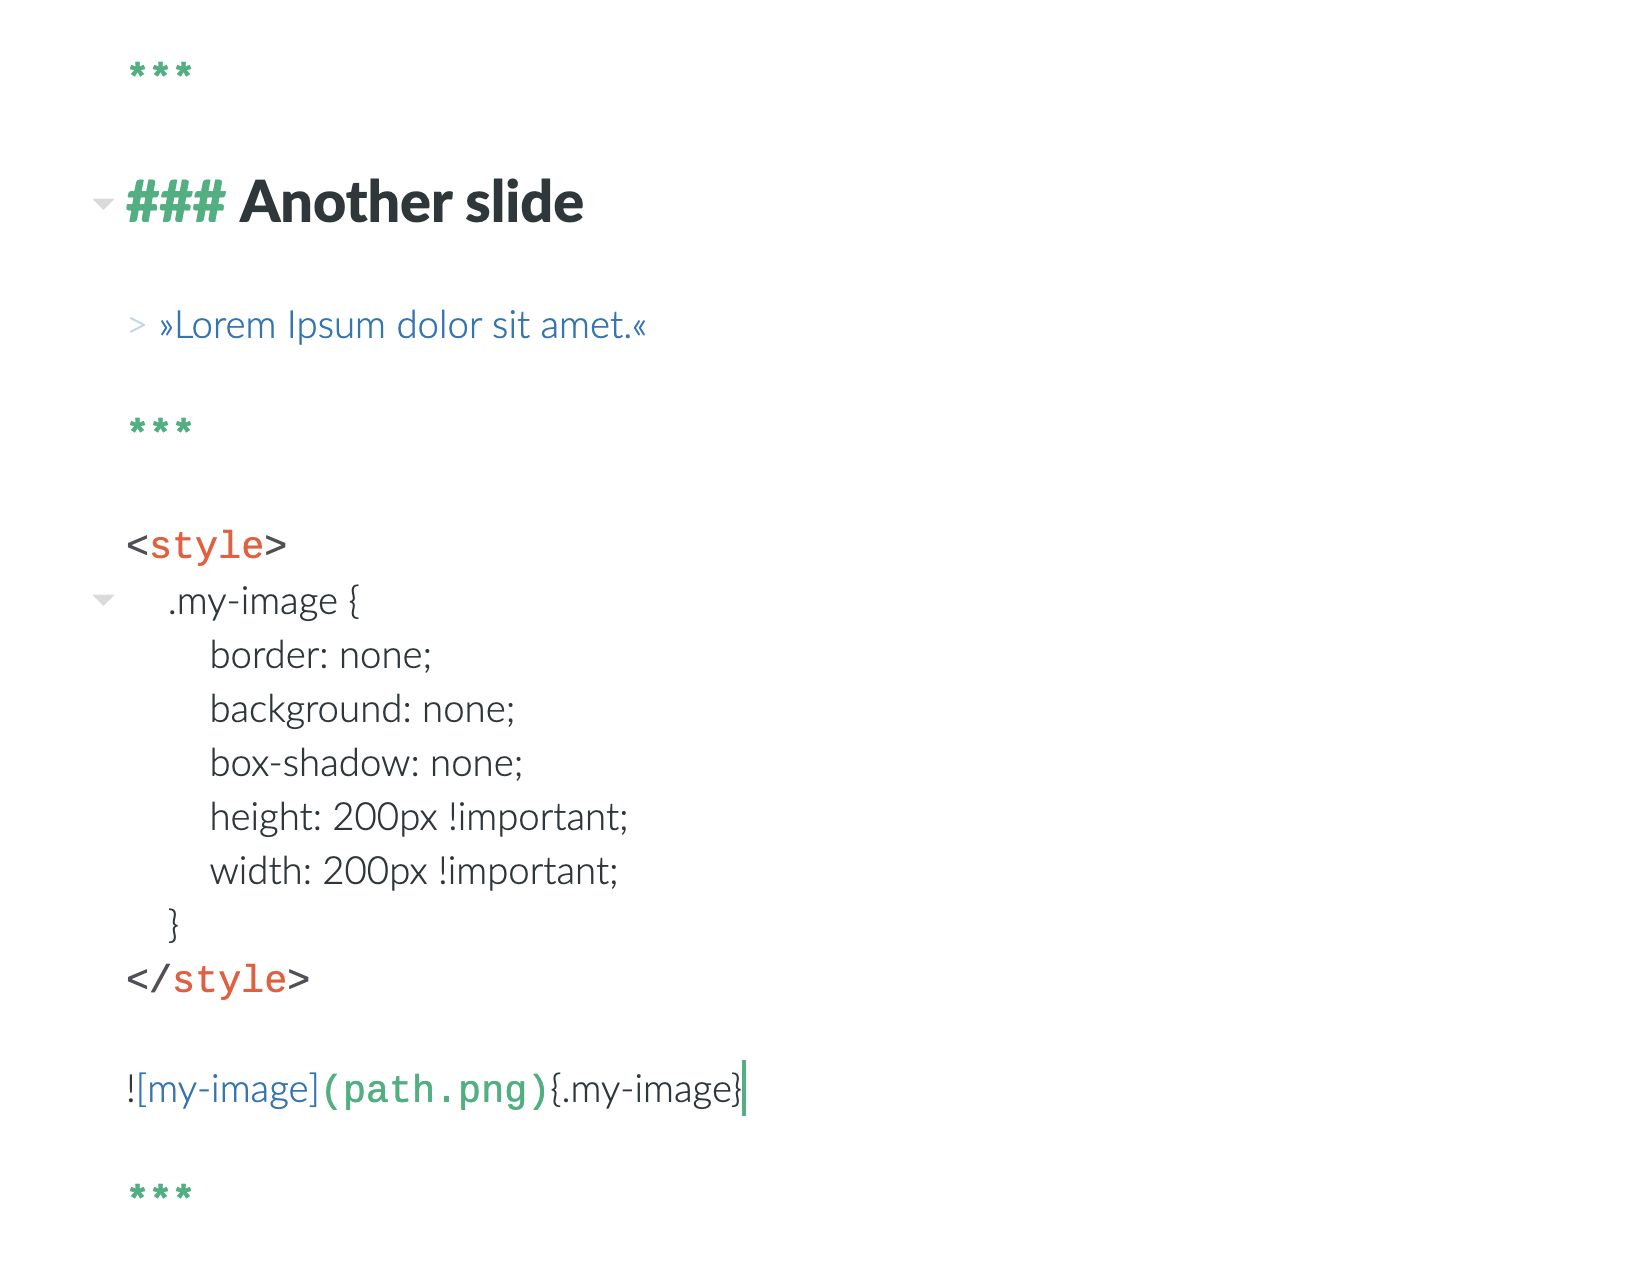
Images
One of the big drawbacks of such HTML presentations is that images cannot be contained in the resulting file. (To be correct, they can be included, but that would increase the file size by the size of all images multiplied by the factor 1.3.)
So you need to decide where to put the images. There are basically three feasible methods.
- Create a dedicated directory for the images, e.g.
img, inside the directory with your markdown file. Then link to all images using relative paths (img/my-image.jpg). When you export your file, make sure the presentation is in the same place relative to the image directory as your source file. - Simply put all images inside the same directory as your presentation file. Then linking to them using their file name should suffice.
- Upload them to the web, for instance unto an image hosting service, and link their URLs. Only drawback: You would need to rely on a working internet connection at the place where you hold your presentation.
A rule of thumb is: If Zettlr correctly displays your images, so will your presentation, as long as you make sure the presentation is in exactly the same directory as your source file relative to the images.